Creating a professional electrical invoice is crucial for electricians and contractors alike. Not only does it ensure timely payment for services rendered, but it also portrays a sense of professionalism that can enhance client relationships and boost your reputation in the industry.
Read on to discover the key components, best practices, and tools you need to create an invoice that not only gets noticed but also gets paid on time.
Understanding the Components of an Electrical Invoice
You know better than anyone that to build an electrical circuit, you need specific components for it to work properly. Invoices are the same. The invoice needs to provide your client with all the information they need to make a payment easily and promptly. There are three main components to an invoice:
- Invoice header. The header sets the first impression for the invoice and needs to include information such as your company logo, name and contact information. Directly under the header should be the subheading, which is typically broken up into two sections. The left section will show the client information such as name, billing address, and contact information; the right should include the invoice number, invoice date, and amount due.
- Invoice body. This section should show a detailed itemized list of services, supplies and the corresponding quantities, the price per item, and the total for each line item. By breaking out items line by line, you provide complete transparency of what your client is being charged for. Of course, at the bottom of the list of items should be the total for the project.
- Invoice footer. This part of the invoice tells the client how to pay, what the payment terms are, and any other notes you may have to simplify the payment process.
Choosing the Right Software to Create Electrical Invoices
The right software to create electrical invoices should encompass and streamline every aspect of your project from initial customer contact to payment. By including every aspect, your invoices will be more accurate and more detailed, and they’ll make it very easy for your clients to pay. Here are some things to look for when choosing the right software solution.
- Customization. The right software should allow you to customize any information you are sending to clients so that they know the information is from you, not some third-party software company. With Project 2 Payment, you can upload your logo and contact information, so it shows accurately within each piece of communication you send your customers.
- Accuracy. You need software that keeps all the items you may charge for in a centralized, editable library that allows for easy estimates and invoice creation. In your branded invoice template through Project 2 Payment, you can either change your estimate into an invoice or create an instant invoice by just adding the items from your item library that you will be receiving payment for.
- Payment acceptance. It’s all about the flow when it comes to going from invoicing to getting paid. With a detailed invoice in which the customer can just click-to-pay through the link provided, not only will you get paid faster, but you will also be able to track every single payment.
- Reporting. This is crucial to understanding the health of your electrical services business. The right software will provide accessible information on project estimates requested, invoice statuses, and payments. Check out Project 2 Payment’s Business Reporting dashboard to see how we can help you with your business health checkup.
- Software support. When signing up for new software, something most business owners gloss over on until they really need it is the availability of software support. Lacking proper support can put your business in a bind at the most inconvenient of times. That’s why the Project 2 Payment support team is always ready to handle all your questions about the software and is available by phone and email (at no extra cost).
How to follow up on Unpaid Electrical Invoices
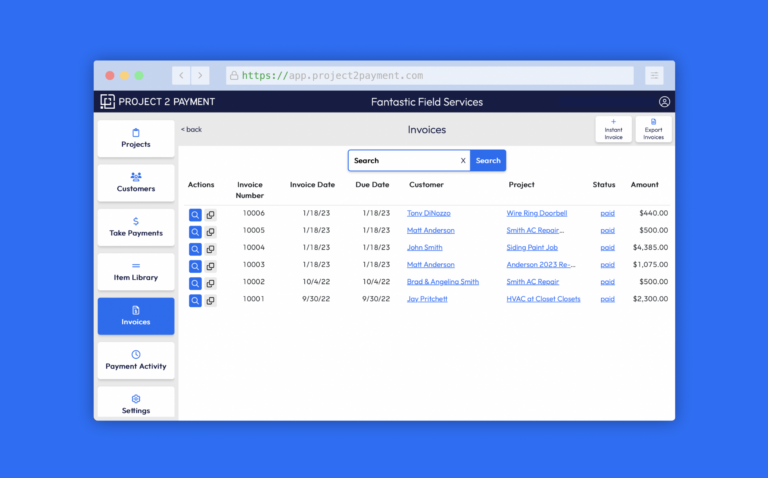
The invoices have been sent and payments are coming in, but which invoices have been paid? This again is where software jumps in to save the day! You could stay in the old-school way of sifting through paper copies of the invoices and then manually comparing those to bank deposit slips. Or you could look at your Invoice Dashboard within Project 2 Payment to see which invoices have not been paid.

To make it even easier for you, Project 2 Payment also gives you the option to set automated invoice reminders, which are emails sent to your customers with the electrical invoice details requesting payments. You can set how often the email reminders are sent and customize the messaging. The automated invoice reminder helps you get paid faster and ensures you aren’t spending hours shuffling through paper piles.
Crafting a professional electrical invoice isn’t just about billing—it’s about solidifying your reputation, fostering client trust, and ultimately ensuring the success of your business. By mastering the components of an effective electrical invoice and leveraging the right software solution like Project 2 Payment, you not only streamline your billing process but also enhance your ability to get paid promptly. From customizable templates to automated reminders, these tools empower you to focus on what you do best—providing exceptional electrical services—while ensuring that your financial operations run smoothly. So, whether you’re a seasoned electrician or just starting out, investing in the creation and management of your electrical invoices is an investment in the growth and sustainability of your business.
